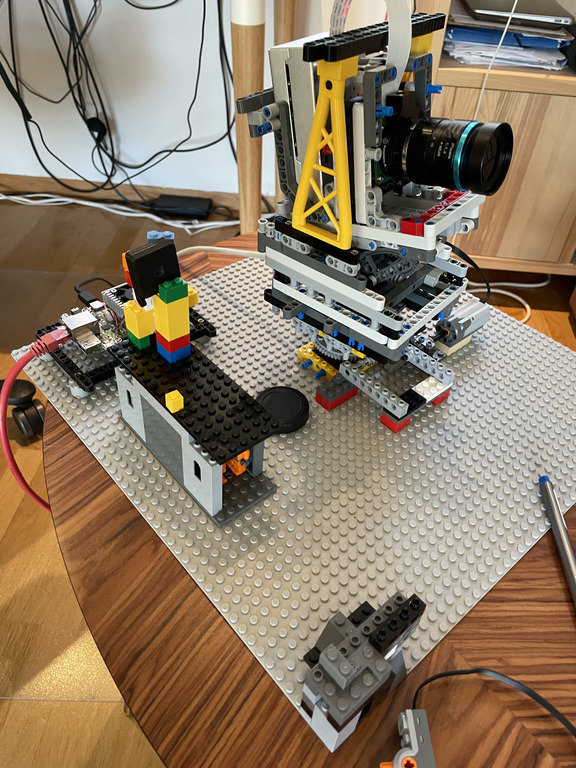
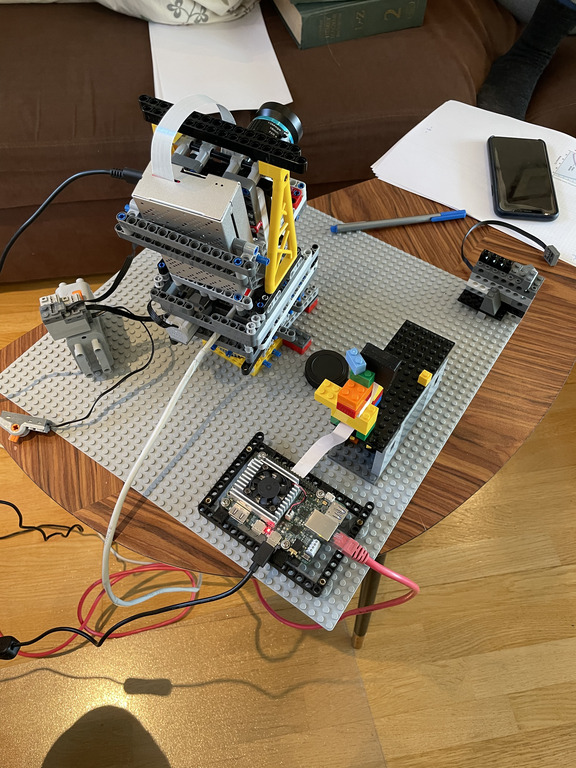
Parallel to the BFCal project, I already started to work on my next one. It's a relatively complex one, so it took several weekends and long nights to get it to a presentable state. As I have a zoom objective attached to the Raspberry Pi and a Coral board with another camera, my idea was to sync them. Let me explain ...
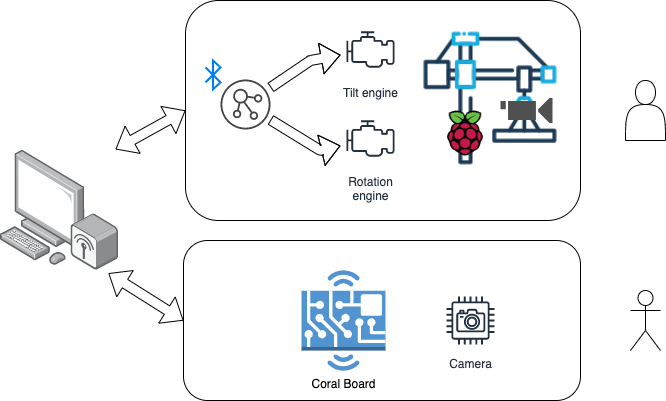
The Raspberry Pi High Quality Camera has a zoom lens, while the Coral Board has a low resolution, but wide-angle
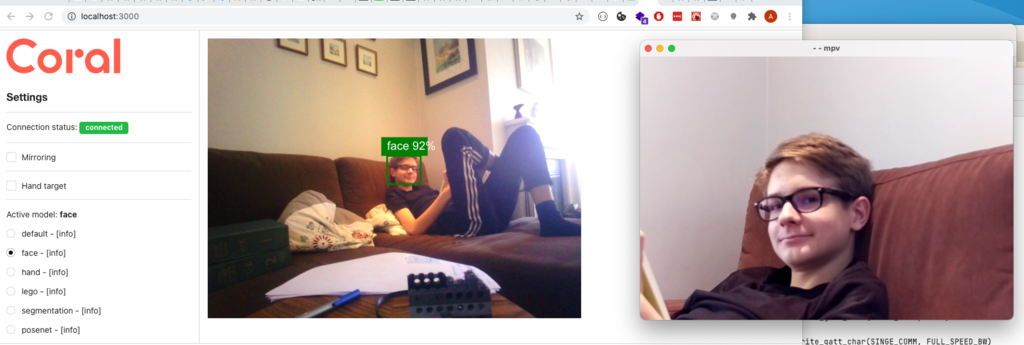
lens. The coral board and its camera detect a face in the picture and will point the Raspberry Pi camera
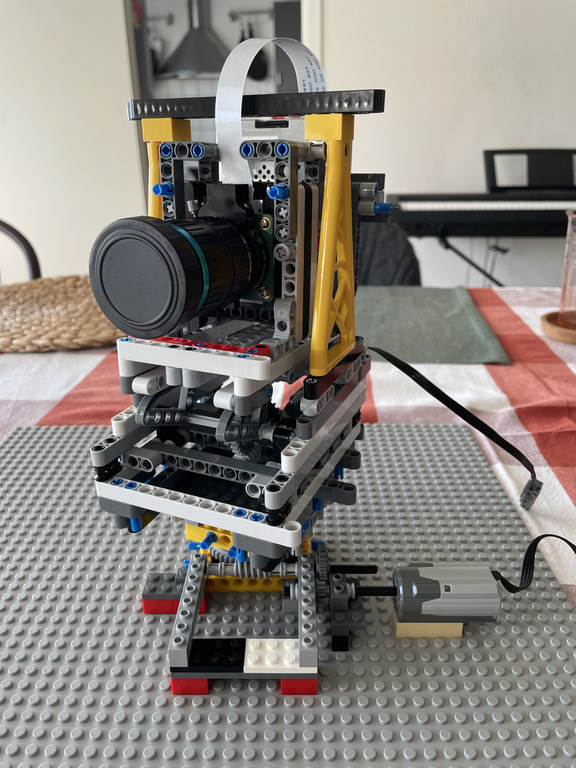
to that face. Pointing is done by a LEGO rig, that holds the Raspberry Pi and the camera. The LEGO rig has 2 electric
motors, where one is responsible for rotation, and the other is tilting the cam. The electric motors are operated
through the SBrick. The SBrick is controlled through Bluetooth from a web interface, or from its phone app.
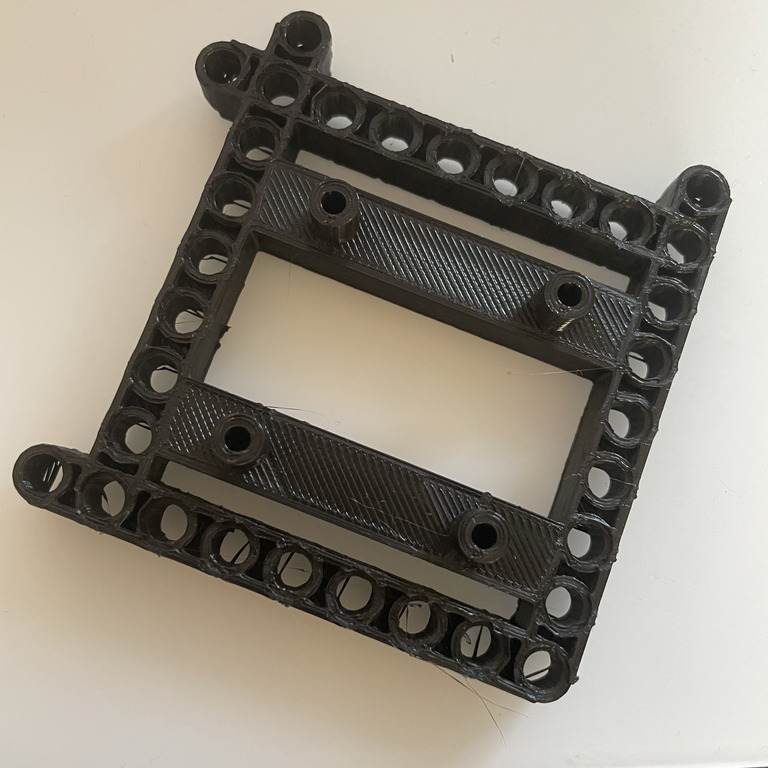
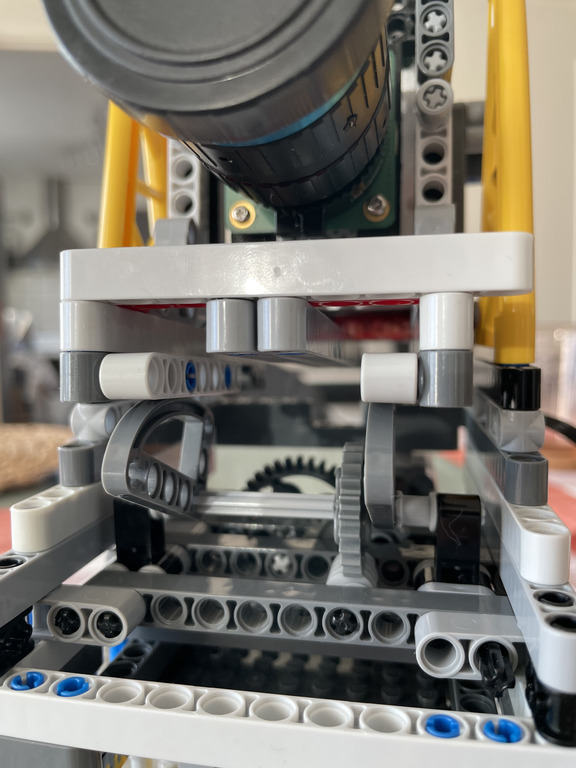
As I shown it in the earlier writing, for the Pi's camera I've 3d printed a mount. That mount was not stable
enough and I wanted to integrate the cam into a LEGO rig. So, I had to design a small mounting component that fits well
with the LEGO Technic system. Needless to say, it took a lot of my free time to design + print the component ...
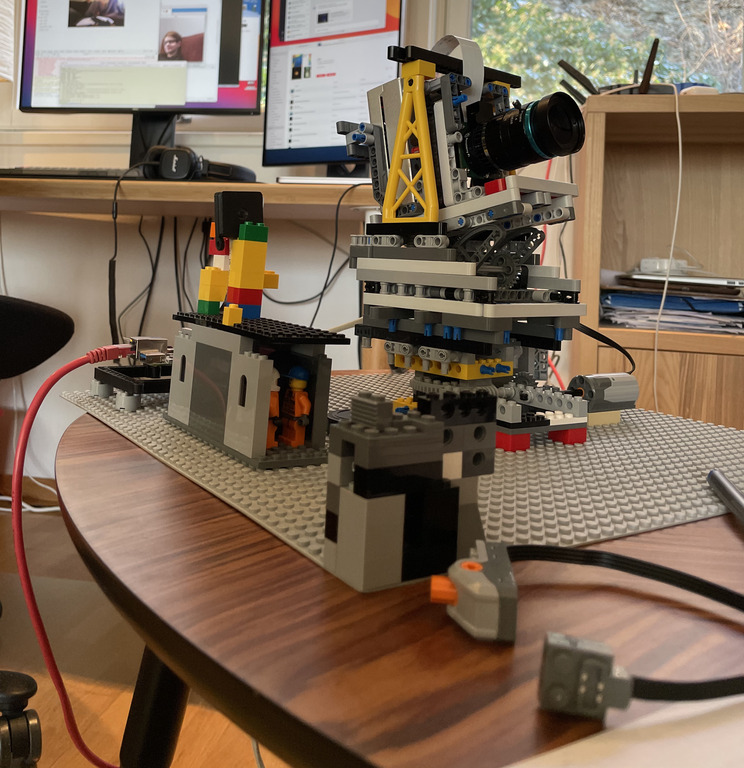
First version of the rig was relatively fast to build. That first version was only capable to rotate.
Even with this version I had to go through several iterations to get a solid structure that can hold the Pi and
the Cam. As the lens is pretty heavy, balancing the structure was important.
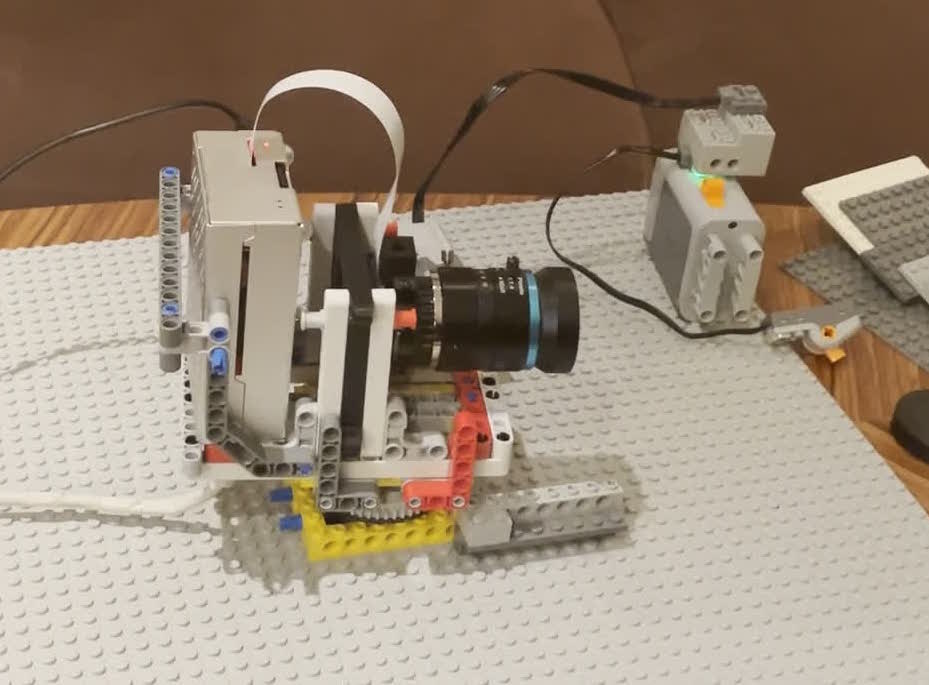
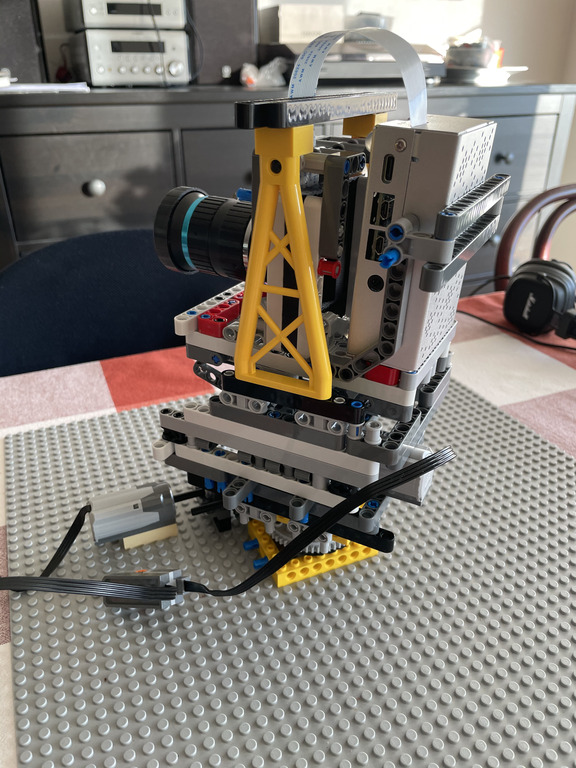
Last week, I've already figured how the tilting shall be implemented LEGO wise, but the first versions
were extremely fragile. So, Friday night I eagerly sat down to create a stable one. In addition, I also had to
figure out how to 'motorize' it as the early versions were operated manually. I managed to come up with a new
structure, motorized, but it was way too fragile ...
So what else to do on a Saturday night during Corona times, but to play with LEGO :) created a more stable
structure, but motorizing it turned out to be a hard nut to crack. Luckily my Sunday was mostly free for LEGO'ing.
Forced myself to implement motorization first, to get the gears right, to achieve ideal speed. When I had that,
I totally rebuilt the frame that is holding the camera, and also the one that rotates it. And this time everything
turned out to be super stable :D
Now it was just a walk in the park to connect everything together. If you read my earlier articles, I had all the pieces already:
This is the way ... how I like to work on projects. Set a goal, that is far ahead, complete all the little
steps toward it, and enjoy the end result. As I discussed with several people, doing these hobby projects and forcing
myself to document them, helps me to better understand how to stay focused ...
Below is the final result, the Coral Board detecting my sons face, and the stream from the Pi, where his face is in focus.